I was formatting a long academic document in Microsoft Word. Everything in the main chapters was set up nicely.
The normal chapter tables used chapter-based numbering:
Table 1.1
Table 1.2
Table 2.1
Then I reached the appendices.
For the appendices, I needed the table captions to switch to Roman numbering matching the appendix titles:
Table I.1
Table I.2
Table II.1
Table II.2
Most importantly, both normal chapter tables and appendix tables had to appear together in one single List of Tables in the front matter.
Right after sorting out my abbreviations list with my custom Word macro, I ran into one of the most stubborn limitations in Microsoft Word.
Every time I tried to format the appendix captions using Word’s built-in dialogs, my document broke in strange ways.
Here is what went wrong, why it happens, and the step-by-step solution that fixes it permanently.
The Problem: Why Does Microsoft Word Break?
Word has three distinct design behaviors and constraints that conflict when you try to number appendix tables.
1. The Caption Numbering Dialog is Global
In Word, when you go to:
References → Insert Caption → Numbering…
and check Include chapter number, Word lets you pick which heading level provides the chapter number.
The catch is that this setting is global per caption label.
If you tell Word that the Table label should get its number from Heading 1, all tables in the document look for Heading 1.
If you change the setting to Heading 6 so your appendix tables can use Roman numerals, Word changes the rule for the entire document.
The moment you press Ctrl + A and F9 (or update your List of Tables), Word recalculates every caption. Because Chapter 1 does not have a Heading 6 above it, Word searches forward through the document until it finds the first one in Appendix I.
Suddenly, your chapter tables turn into:
Table I.1
Table I.2
Your chapter numbering is completely wiped out.
2. Built-in Headings Break the Navigation Pane
To get around the caption numbering limitation, a common workaround suggested online is to use Heading 6 for appendix headings.
It seems to work for captions at first, but it ruins your Navigation Pane.
In Word, built-in heading levels have locked outline levels:
Heading 1= Level 1 (flush left)Heading 2= Level 2Heading 6= Level 6 (indented 5 tabs deep)
When you format your appendix headings as Heading 6, Word pushes them far across the Navigation Pane:
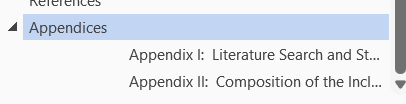
It looks like an outline error, and it collapses under your final chapter instead of standing as its own major section.
3. Inserting Two Separate Lists Causes Replacements
If you create a separate caption label (like Appendix Table) to keep the numbers apart, you then need to show both in the front matter.
When you try to insert a second Table of Figures on the same page, Word displays this dialog:
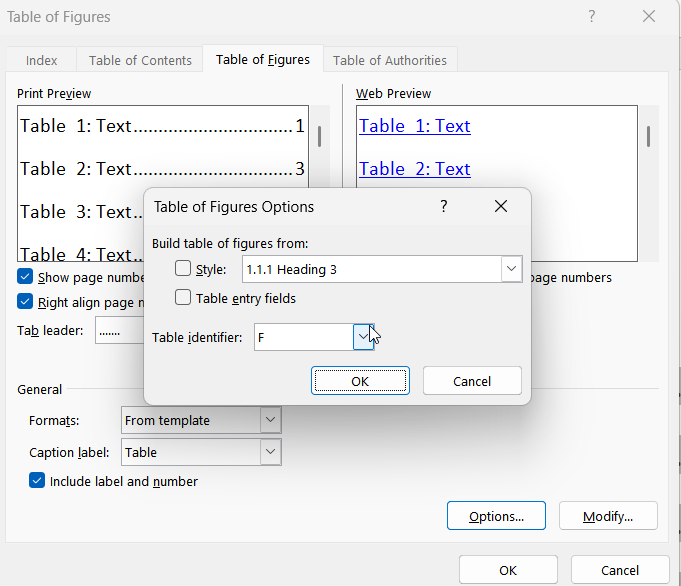
Word asks:
“Do you want to replace the selected table of figures?”
If your cursor is anywhere near the first list, or if you accidentally press Enter, Word replaces your chapter table list with the appendix list. Keeping two separate lists aligned on the same page without Word constantly trying to overwrite one of them is frustrating.
The Solution: How to Build a Clean Architecture That Never Breaks?
To get a clean document that passes any formatting check, we need three things:
- Global Styles & Multilevel List: Keep appendix titles at clean Level 2 (or Level 1) in the Navigation Pane.
- Untouched Caption Dialog: Leave Word’s default
Tablelabel permanently locked toHeading 1. - Direct Field Codes for Appendices: Use Word’s native
STYLEREFandSEQ Tablefields for appendix tables so they feed directly into the same single List of Tables.
Here is the step-by-step setup.
Step 1: How to Set Up Global Styles and the Multilevel List?
First, we set up dedicated styles for our appendices so they sit at the correct level in the Navigation Pane without disturbing standard chapter headings.
Here is how the styles appear in the Word Styles gallery:
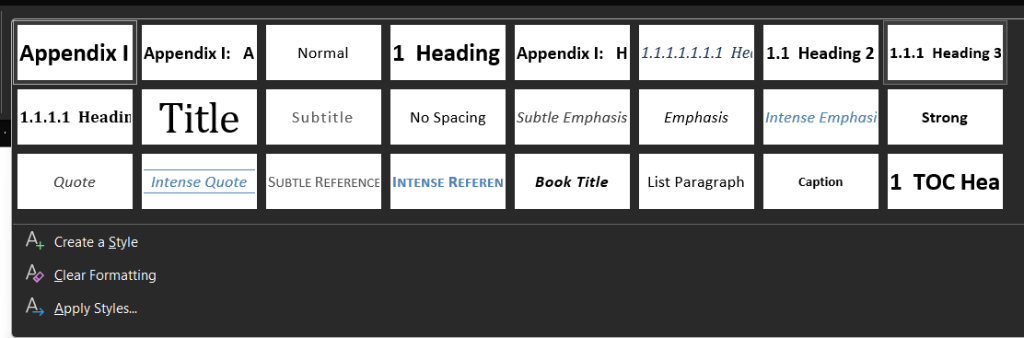
1. Create the Main “Appendices” Divider Style
If your thesis or report has a main divider page or heading called Appendices, create a style based on Heading 1:
- On the Home tab, open the Styles pane and click New Style (or right-click to modify an existing custom style).
- Name:
Appendices - Style based on:
Heading 1 - Set your font size and formatting as needed.
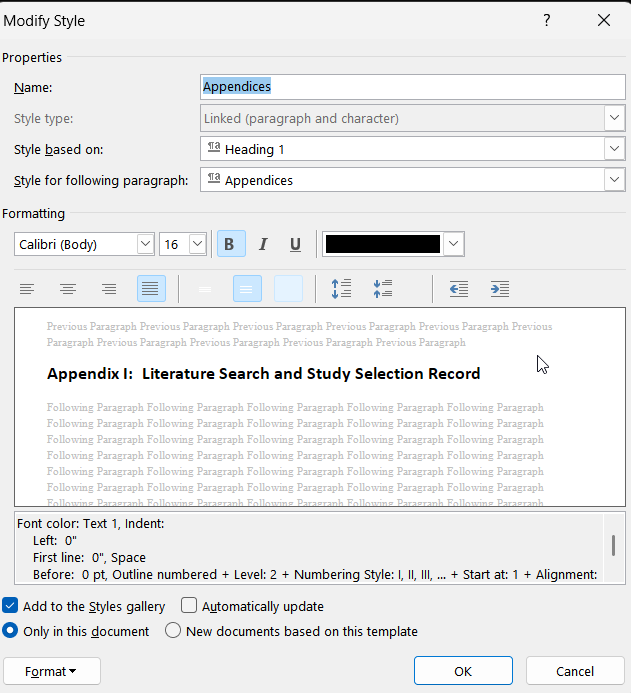
This ensures the word Appendices sits flush at Level 1 in your Navigation Pane.
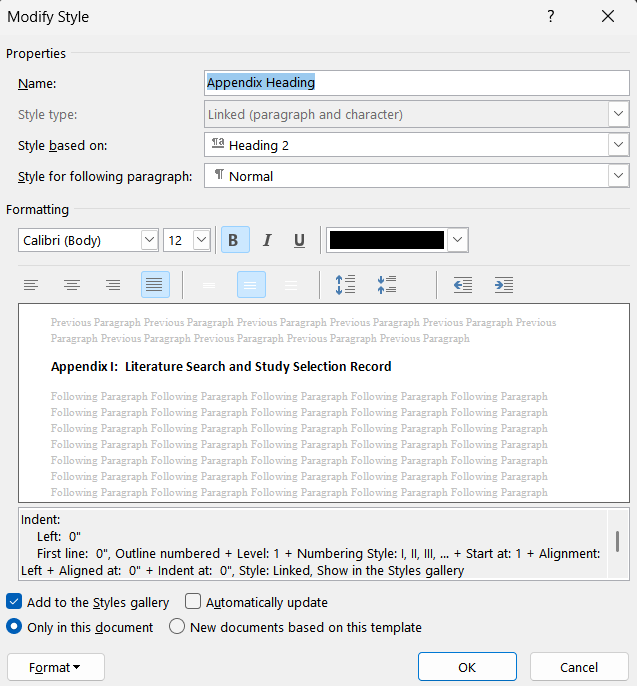
2. Create the “Appendix Heading” Style
For individual appendices (like Appendix I: Supplementary Data), create a style based on Heading 2:
- In the Styles pane, click New Style.
- Name:
Appendix Heading - Style based on:
Heading 2 - Click Format → Paragraph at the bottom left, and verify Outline level is set to Level 2 (or Level 1 if your appendices stand parallel to chapters).
3. Set Up the Multilevel List
To make your appendix headings number automatically as Appendix I, Appendix II, attach them to a Multilevel List:
- Go to Home → Multilevel List → Define New Multilevel List.
- Click More >> at the bottom left to see all options.
- Select the level you want to use for individual appendices.
- In Number style for this level, choose uppercase Roman numerals (
I, II, III...). - In Enter formatting for number, type
Appendixbefore the shaded number:Appendix I(do not type a colon inside this box). - Set Follow number with to Nothing (or Space).
- On the right, under Link level to style, select your custom style:
Appendix Heading. - Click OK.
Now, when writing your heading in the document, start your actual text with the colon, for example:
: Supplementary Measurement Data.
On your page, in the Navigation Pane, and in your Table of Contents, it renders cleanly as:
Appendix I: Supplementary Measurement Data.
Why keep the colon out of the numbering box?
If you put a colon inside the Multilevel List number format, Word considers the colon part of the number string. Later, when your table caption pulls the number, Word pulls I: instead of I, resulting in an ugly Table I:.1 caption. Keeping the colon in the text avoids this bug entirely.
Step 2: How to Lock Chapter Tables to Heading 1?
Before touching appendix tables, make sure your standard chapter tables are locked to Heading 1:
- Go to any table in Chapter 1.
- Go to References → Insert Caption.
- Label: select Table.
- Click Numbering…:
- Format:
1, 2, 3, ... - Check: Include chapter number
- Chapter starts with style: Heading 1
- Separator: . (period)
- Format:
- Click OK, then click Cancel (so you do not insert an empty caption).
- Press
Ctrl + Aand thenF9to update the document.
Your normal chapter tables will display as Table 1.1, Table 1.2, Table 2.1.
Important Rule: Once your custom appendix caption fields are configured, avoid changing the chapter-number settings for the Table label through References → Insert Caption → Numbering… because Word may rewrite caption fields associated with that label.
Step 3: How to Create Appendix Captions Using Fields?
Because Word’s GUI dialog cannot link custom styles to chapter numbers, we insert the appendix caption using native field codes.
It takes about ten seconds for the first table, and after that, you can simply copy and paste it.
For the First Table in Appendix I:
- Place your cursor where you want the caption for your first appendix table.
- Type the following text:
(Notice the space betweenTable .1: Supplementary Measurement DataTableand the dot). - Place your cursor between
Tableand.1. - Press Ctrl + F9 on your keyboard. Word inserts field brackets
{ }. - Inside those brackets, type:
(TheSTYLEREF "Appendix Heading" \n \t\nswitch pulls the paragraph number, and\tsuppresses non-numeric text like the word “Appendix “, leaving only the Roman numeral “I”. This combination is officially documented by Microsoft and recommended by Word MVPs like Suzanne Barnhill). - Next, highlight the number
1right after the dot, and press Ctrl + F9. - Inside those brackets, type:
(This keeps the table in the standardSEQ Table \r 1Tablesequence, while\r 1forces it to start at 1 for Appendix I).
Behind the scenes, your caption code looks like this:

Table { STYLEREF "Appendix Heading" \n \t }.{ SEQ Table \r 1 }: Supplementary Measurement Data- Select the caption line and press Shift + F9 to hide the field codes.
- Press F9 on your keyboard (or right-click and choose Update Field).
Word evaluates the fields and displays:
Table I.1: Supplementary Measurement DataKeyboard Shortcuts to Remember:
- Ctrl + F9: Inserts empty field brackets
{ }. You cannot type curly brackets from your keyboard; Word only recognizes fields created withCtrl + F9. - Shift + F9: Toggles field codes on and off for the selected field only.
- Alt + F9: Toggles field codes on and off for the entire document.
- F9: Updates the selected field (or all selected text).
Step 4: How to Add Remaining Appendix Tables?
You do not need to create field codes from scratch for subsequent tables. Just copy and paste:
For a Second Table in the Same Appendix (Table I.2):
- Copy the caption from Table I.1 and paste it at the second table.
- Select it and press Shift + F9 to reveal the code.
- Remove
\r 1so the sequence field reads{ SEQ Table }. - Press Shift + F9 to hide the code, then press F9.
- It automatically increments to
Table I.2.
For the First Table in Appendix II (Table II.1):
- Copy the caption from Table I.1 (the one that has
\r 1) and paste it under Appendix II. - Press F9 to update it.
- Word automatically detects the
Appendix IIheading above it, changesItoII, and restarts the count at1:Table II.1: Calibration Summary
Step 5: How to Update Your Single Table of Tables?
Because our appendix tables use the standard sequence name SEQ Table, Word’s built-in Table of Figures command collects them automatically.
- Go to your List of Tables in the front matter.
- If you do not have one yet, go to References → Insert Table of Figures, select Caption label Table, and click OK.
- Right-click anywhere on the table and choose Update Field → Update entire table → OK.
The Final Result:
Both chapter tables and appendix tables appear in one single, unified list:
Table 1.1   Sample Distribution ........................... 14
Table 1.2   Baseline Characteristics ...................... 18
Table 2.1   Regression Parameters ......................... 42
Table I.1   Supplementary Measurement Data ................ 88
Table I.2   Data Collection Parameters .................... 92
Table II.1  Calibration Summary .......................... 105
Why Does This Architecture Work?
- No Field Clashes: Chapter tables keep their Arabic numbering (
Table 1.1,Table 1.2), and appendix tables keep their Roman numbering (Table I.1,Table II.1). - Clean Navigation Pane: Appendix titles use
Appendix Heading(Level 2), avoiding the deep 5-tab indent caused byHeading 6. - One Single Table of Tables: You never have to insert two adjacent lists or deal with Word’s prompt asking to replace the existing table.
- Update-Safe Numbering: Because both caption systems retain the standard
SEQ Tableidentifier and the appendix captions explicitly manage their prefix and resets, normal document field updates (Ctrl + AthenF9) safely preserve both numbering formats without needing two separate Lists of Tables.
If you are writing a thesis or long technical report, setting up your styles and field codes this way at the beginning saves hours of troubleshooting.